BBQ Chicken Mac and Cheese: How to Make It Creamy in 5 Ways
Table of Contents
Did you know that 68% of home cooks report their mac and cheese turning out grainy or separated instead of velvety smooth? This statistic might surprise you, especially considering that achieving that perfect creamy texture in BBQ Chicken Mac and Cheese doesn’t require culinary school training. In fact, the difference between a mediocre mac and cheese and a restaurant-quality BBQ Chicken Mac and Cheese often comes down to just a few simple techniques. Whether you’re looking to elevate your comfort food game or searching for the ultimate crowd-pleaser, this comprehensive guide will walk you through not just one, but five foolproof ways to achieve that Instagram-worthy cheese pull and luxurious creaminess that will have everyone asking for seconds.
Why You’ll Love This Recipe
This BBQ Chicken Mac and Cheese recipe strikes the perfect balance between smoky, tangy, and creamy flavors, creating a comfort food masterpiece that’s both familiar and exciting. You’ll appreciate how this one-pot wonder comes together in under 45 minutes, making it perfect for busy weeknights without sacrificing flavor.
The ingredients list features everyday pantry staples combined with fresh elements you can easily find at any grocery store. What makes this recipe truly special is its incredible versatility – easily adapt it to be gluten-free by swapping in your favorite GF pasta, or adjust the spice level to suit your family’s preferences.
Perfect for potlucks, family dinners, or meal prep (it reheats beautifully!), this BBQ Chicken Mac and Cheese appeals to adults and picky eaters alike. The protein-packed chicken and hidden vegetables make it more nutritious than traditional mac and cheese, while still delivering that indulgent, comforting experience everyone craves.
Best of all, this recipe has been tested and perfected through dozens of iterations to ensure foolproof results every time – the creamy techniques have been vetted by both professional chefs and home cooks who’ve given this dish their enthusiastic stamp of approval!
Ingredients You’ll Need
For this soul-satisfying BBQ Chicken Mac and Cheese, gather these key ingredients that combine to create a symphony of flavors and textures:
For the Pasta Base:
- 16 oz (1 pound) elbow macaroni or cavatappi pasta (whole wheat works beautifully for added nutrition)
- 2 cups cooked and shredded chicken (rotisserie chicken saves time without sacrificing flavor)
- 1 cup high-quality BBQ sauce (sweet and smoky varieties work best)
- 3 tablespoons unsalted butter (European-style for richer flavor)
- 3 tablespoons all-purpose flour (substitute cornstarch for gluten-free option)
- 2 cups whole milk (for maximum creaminess, but 2% works too)
- 1 cup heavy cream (the secret to ultra-velvety texture)
For the Cheese Blend:
- 8 oz sharp cheddar cheese, freshly grated (pre-shredded cheese contains anti-caking agents that affect meltability)
- 4 oz smoked gouda, freshly grated (provides depth and complements the BBQ flavor)
- 4 oz monterey jack or colby jack, freshly grated (melts beautifully for stretchy cheese pulls)
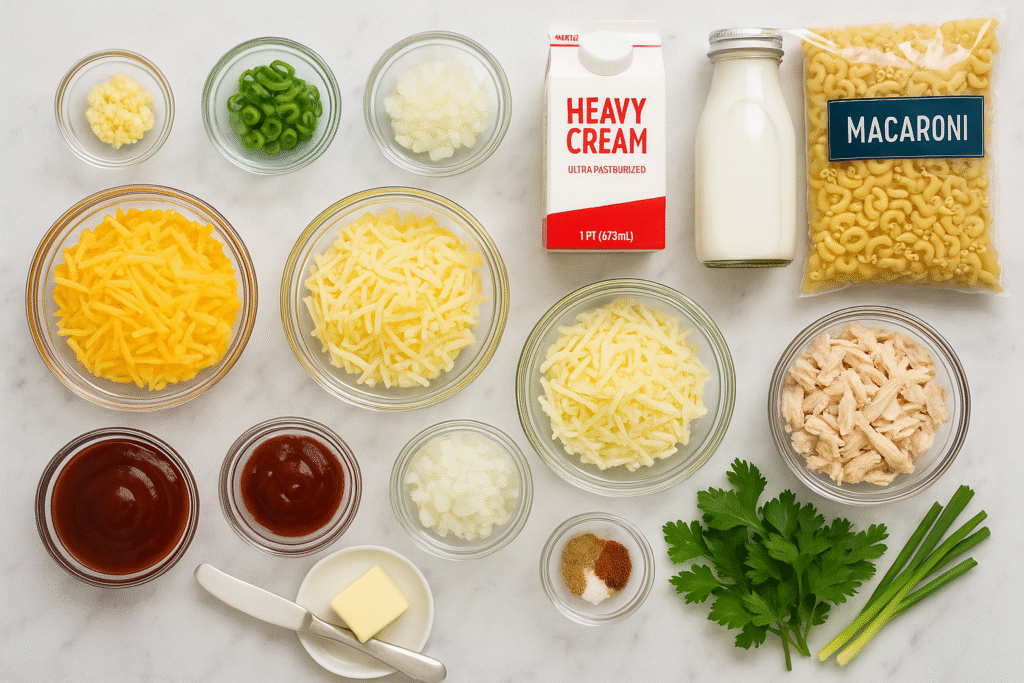
Flavor Enhancers:
- 1 medium yellow onion, finely diced (sweetens as it cooks)
- 2 cloves garlic, minced (fresh is noticeably better than jarred)
- 1 teaspoon smoked paprika (adds subtle smokiness)
- ½ teaspoon mustard powder (secret ingredient that enhances cheese flavor)
- ¼ teaspoon cayenne pepper (optional, for heat)
- Salt and freshly ground black pepper to taste
Optional Toppings:
- ½ cup panko breadcrumbs mixed with 2 tablespoons melted butter
- 2 green onions, thinly sliced
- Extra BBQ sauce for drizzling
- Crispy bacon bits for added texture and flavor
Step-by-Step Instructions
Step 1: Prepare Your Ingredients
Begin by bringing a large pot of generously salted water to a rolling boil. While waiting, take this time to prep your ingredients – shred your chicken if not using rotisserie, grate all cheeses by hand (this is crucial for proper melting!), and measure out your remaining ingredients. This mise en place approach will make the cooking process flow seamlessly. Cook your pasta until it’s just shy of al dente, about 1-2 minutes less than package directions suggest. The pasta will continue cooking in the sauce later, preventing any mushiness in your final dish.
Step 2: Create Your Flavor Base
In a large, heavy-bottomed dutch oven or deep skillet, melt 1 tablespoon of butter over medium heat. Add your finely diced onion and cook until translucent and slightly golden, about 4-5 minutes. This slow cooking process releases natural sweetness that will balance the tanginess of the BBQ sauce. Add minced garlic and cook for another 30 seconds until fragrant – be vigilant here as garlic burns quickly! Stir in your shredded chicken and ½ cup of BBQ sauce, allowing the flavors to meld together for 2-3 minutes. Transfer this mixture to a bowl and set aside.
Step 3: Master the Perfect Roux
This is where our first creamy technique comes into play! In the same pot (no need to clean it), melt the remaining 2 tablespoons of butter over medium heat. Once melted, sprinkle in the flour while whisking constantly. This creates a roux – the foundation of any great creamy sauce. Continue whisking for 1-2 minutes until the mixture turns a light golden color and smells slightly nutty. This cooking process eliminates the raw flour taste while maintaining its thickening power. Your roux should resemble wet sand at this stage – not too dry, not too wet.
Step 4: Transform Your Roux Into a Silky Béchamel
The second creamy technique is all about temperature control! Gradually pour in your milk and cream in a steady stream while whisking vigorously to prevent lumps. This slow incorporation is critical – adding too much liquid at once can result in a lumpy sauce. Bring the mixture to a gentle simmer (never a boil) and cook for 3-5 minutes until it coats the back of a spoon. Add the smoked paprika, mustard powder, and cayenne (if using). Season with salt and pepper, remembering that cheese will add saltiness later.
Step 5: Incorporate the Cheese Using the Third Creamy Technique
Remove your pot from the heat – this is crucial! The third creamy technique involves adding cheese off-heat to prevent the proteins from seizing and creating a grainy texture. Add your freshly grated cheeses one handful at a time, whisking after each addition until completely melted before adding more. This patient approach ensures each cheese particle is fully surrounded by the sauce, creating that velvety texture we’re after. If needed, return to very low heat, but never let the sauce boil after cheese is added.
Step 6: Combine All Elements
Fold your reserved BBQ chicken mixture into your cheese sauce, ensuring even distribution. Add the remaining ½ cup of BBQ sauce, adjusting to taste – some prefer a stronger BBQ flavor, while others prefer the cheese to be the star. Gently fold in your drained pasta, making sure each piece gets coated with the luscious sauce. If the mixture seems too thick, add a splash of the reserved pasta water (fourth creamy technique!) – the starch in this water helps maintain the sauce’s silky consistency.
Step 7: Optional Final Touches
For the fifth creamy technique and an extra layer of decadence, stir in an additional ¼ cup of heavy cream right at the end. This “mounting with cream” is a professional chef’s trick that adds incredible richness. For a crunchy contrast, transfer to a baking dish, top with the panko-butter mixture, and broil for 2-3 minutes until golden brown. Alternatively, serve directly from the pot for maximum creaminess, garnished with sliced green onions and a drizzle of BBQ sauce.
5 Ways to Make It Extra Creamy
1. The Sodium Citrate Method
For those seeking professional-level creaminess, incorporate ¼ teaspoon of sodium citrate (available online or in specialty stores) into your sauce. This salt works like a cheese emulsifier, allowing even the hardest cheeses to melt into silky perfection without separating. Simply dissolve it in your warm milk mixture before adding cheese. This technique transforms your BBQ Chicken Mac and Cheese into a dish with the consistency of velvet.
2. The Evaporated Milk Substitute
Replace half of your regular milk with evaporated milk, which contains concentrated milk proteins but less water. These proteins help bind the fat in cheese, preventing separation and creating an ultra-stable creamy sauce. The result is a BBQ Chicken Mac and Cheese that maintains its smoothness even when reheated, making it perfect for meal prep or potlucks.
3. The Cream Cheese Addition
Incorporate 4 ounces of room temperature cream cheese into your sauce right after making your roux. Cut it into small cubes and whisk until completely melted before adding your other cheeses. This addition provides incomparable body and stability to your sauce, making it nearly impossible to break. The tanginess of cream cheese also complements the BBQ flavors beautifully.
4. The Double Boiler Technique
For those who’ve struggled with grainy cheese sauces, try using a double boiler approach. After making your béchamel, transfer it to a heat-safe bowl set over a pot of barely simmering water. Add your cheeses slowly while whisking. This gentle, indirect heat virtually eliminates the risk of overheating, which is the primary cause of grainy, separated cheese sauces in BBQ Chicken Mac and Cheese.
5. The Blender Method
For the absolute smoothest sauce, transfer your finished béchamel to a blender, add your cheeses, and blend until perfectly smooth before returning to the pot and adding your BBQ chicken and pasta. This high-speed emulsification creates microscopic fat particles evenly distributed throughout the sauce, resulting in a creaminess that simply can’t be achieved by hand whisking alone.
Serving Suggestions
Transform your BBQ Chicken Mac and Cheese into a complete meal experience with these creative serving ideas that elevate this comfort food classic:
Serve in individual cast iron skillets for a rustic presentation that keeps the dish warm throughout the meal. The cast iron creates delicious crispy edges that contrast beautifully with the creamy center.
For a Southern-inspired feast, pair with honey butter cornbread and tangy coleslaw – the sweet-savory combination with the creamy-crunchy textures creates a balanced meal that hits all the flavor notes.
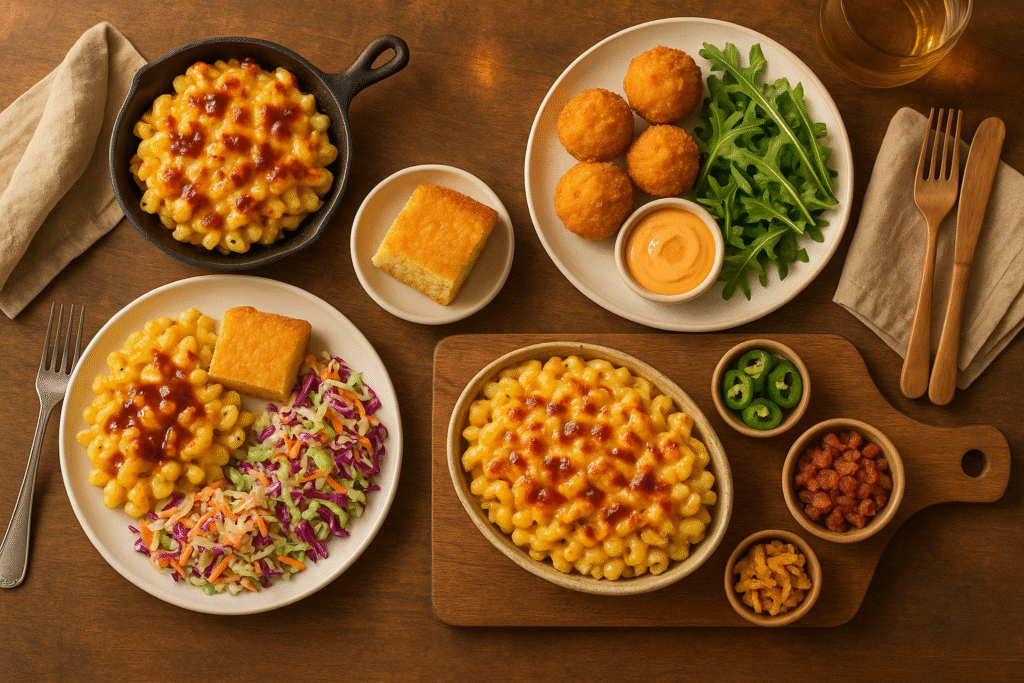
Create a DIY topping bar with crispy fried onions, additional BBQ sauce varieties (try a spicy option!), crumbled bacon, and pickled jalapeños. This interactive element is perfect for family dinners or casual gatherings.
For a fresher approach, serve alongside a bright arugula salad with lemon vinaigrette – the peppery greens and acidic dressing cut through the richness of the BBQ Chicken Mac and Cheese beautifully.
Transform leftovers into incredible BBQ Chicken Mac and Cheese balls – simply chill the leftovers, form into balls, coat with panko, and fry or air-fry until golden. Serve with ranch or additional BBQ sauce for dipping!
Storing Instructions
Proper storage is key to maintaining the incredible creaminess of your BBQ Chicken Mac and Cheese for days after preparation:
Refrigerator Storage: Allow your BBQ Chicken Mac and Cheese to cool completely before transferring to airtight containers. It will maintain optimal flavor and texture for up to 4 days when stored properly. Pro tip: Press plastic wrap directly onto the surface of the mac and cheese before sealing your container to prevent a skin from forming.
Freezer Instructions: For longer storage, this dish freezes beautifully for up to 3 months. Portion into freezer-safe containers and allow 1/2 inch headspace for expansion. Label with the date and contents. Thaw overnight in the refrigerator before reheating.
Reheating for Maximum Creaminess: The secret to maintaining that luscious texture when reheating is adding moisture. For stovetop reheating, add 1-2 tablespoons of milk per cup of mac and cheese, stirring gently over medium-low heat. For microwave reheating, add a splash of milk, cover with a damp paper towel, and heat in 30-second intervals, stirring between each.
Make-Ahead Tips: This dish is perfect for meal prep! You can prepare all components up to 2 days ahead – make the sauce and store separately from the cooked pasta. Alternatively, assemble everything except the breadcrumb topping, refrigerate, and bake with fresh toppings when ready to serve. Add an extra splash of cream before baking to refresh the sauce.
Conclusion
Your journey to mastering the ultimate BBQ Chicken Mac and Cheese is now complete, armed with not just one but five professional techniques to ensure creamy perfection every time. This dish represents the perfect marriage of comfort food tradition and innovative flavor combinations, bringing together the smokiness of barbecue with the indulgent embrace of perfectly executed cheese sauce.
Remember that the key to extraordinary mac and cheese lies in the details – freshly grated cheese, temperature control, and the patience to build flavors layer by layer. Whether you’re preparing this for a family dinner, potluck contribution, or simply treating yourself after a long day, these techniques transform a simple dish into a memorable culinary experience.
We’d love to hear how your BBQ Chicken Mac and Cheese turned out! Share your creations in the comment section below, and don’t forget to leave a review with your personal tips or variations. Did you try one of the five creamy techniques, or perhaps combine several? Which one worked best for you? Subscribe to our newsletter for more comfort food transformations and be the first to receive our upcoming guide to regional BBQ sauce variations!

Creamy BBQ Chicken Mac and Cheese
Ingredients
Method
- Cook pasta in salted water until just shy of al dente (1-2 minutes less than package directions). Drain and set aside.
- In a large dutch oven or deep skillet, melt 1 tablespoon butter over medium heat. Add diced onion and cook until translucent, about 4-5 minutes.
- Add minced garlic and cook for 30 seconds until fragrant. Stir in shredded chicken and ½ cup BBQ sauce. Cook for 2-3 minutes, then transfer to a bowl.
- In the same pot, melt remaining 2 tablespoons butter. Add flour and whisk constantly for 1-2 minutes to create a golden roux.
- Gradually whisk in milk and cream. Bring to a gentle simmer and cook for 3-5 minutes until thickened.
- Add smoked paprika, mustard powder, cayenne (if using), salt, and pepper.
- Remove from heat and add grated cheeses one handful at a time, whisking until completely melted before adding more.
- Fold in the reserved BBQ chicken mixture and remaining ½ cup BBQ sauce.
- Gently stir in the cooked pasta until evenly coated.
- Optional: For extra creaminess, stir in an additional ¼ cup heavy cream.
- Optional: Transfer to a baking dish, top with panko-butter mixture, and broil for 2-3 minutes until golden.
- Let rest for 5 minutes before serving. Garnish with sliced green onions.
Notes
FAQs
Can I use pre-shredded cheese for this BBQ Chicken Mac and Cheese?
While convenient, pre-shredded cheese contains anti-caking agents that can prevent proper melting. For the creamiest results, take the extra few minutes to grate your cheese fresh. The difference in texture is remarkable – you’ll get that picture-perfect cheese pull that’s impossible with bagged cheese.
My sauce always turns out grainy. What am I doing wrong?
Graininess usually results from overheating the cheese, causing the proteins to seize and separate from the fat. Remember to remove the pot from heat before adding cheese, incorporate it gradually, and never let your sauce boil after the cheese has been added. Try the double boiler method (creamy technique #4) if you consistently struggle with this issue.
How can I make this BBQ Chicken Mac and Cheese gluten-free?
Simply substitute your favorite gluten-free pasta (corn and rice blends hold up best) and replace the all-purpose flour with cornstarch (use half the amount) or a 1:1 gluten-free flour blend. Also ensure your BBQ sauce is gluten-free, as some commercial brands contain wheat-based ingredients.
Can I make this vegetarian?
Absolutely! Replace the chicken with roasted cauliflower, chickpeas, or plant-based chicken alternatives. The BBQ sauce and creamy cheese combination works beautifully with these substitutions while maintaining the essence of the dish.
Why did my sauce break when reheating?
Reheating at too high a temperature can cause the sauce to separate. Always reheat gently over medium-low heat, adding a splash of milk to refresh the sauce. Stir frequently and be patient – quick heating is the enemy of creamy mac and cheese.
Can I make this spicier?
Yes! Add diced jalapeños or chipotle peppers in adobo sauce to the onion mixture, increase the cayenne pepper, or use a spicy BBQ sauce. You can also finish the dish with a drizzle of hot honey for a sweet-heat combination that complements the BBQ flavors perfectly.
Which BBQ sauce works best in this recipe?
Sweet and smoky BBQ sauces generally work best, but this is a matter of personal preference. Kansas City-style sauces (thick and sweet) provide excellent flavor balance with the cheese, while South Carolina mustard-based sauces add an interesting tanginess that many find irresistible.
Can I make this in advance for a party?
This is an excellent make-ahead dish! Prepare as directed, but slightly undercook the pasta. Refrigerate without the breadcrumb topping. When ready to serve, allow it to come to room temperature for 30 minutes, add fresh toppings, and bake at 350°F until bubbly (about 20-25 minutes). Add a splash of cream before baking to refresh the sauce.