Cheesy Chicken Garlic Wraps: Why Mine Are the Best 2
Table of Contents
Here’s a question for you: Have you ever found yourself craving a hot, cheesy, satisfying meal, only to be shocked by the price of your fast-food bill? You’re not alone. While over a third of Americans eat fast food on any given day, a staggering 78% now consider it a luxury due to rising costs. Many of us feel that fast food should be a cheaper alternative to cooking at home, but 75% agree that’s simply not the case anymore.
What if you could solve this dilemma? What if you could create that same crave-worthy, convenient meal right in your own kitchen, but make it taste infinitely better and for a fraction of the cost? That’s exactly where these Cheesy Chicken Garlic Wraps come in. This isn’t just another recipe; it’s the definitive answer to your weeknight dinner prayers. It’s a perfected, data-informed method designed to deliver the ultimate comfort food experience—crispy on the outside, gooey and flavorful on the inside—without the drive-thru disappointment. This recipe solves the most common wrap-making pitfalls, ensuring a perfect result every single time.
Why This Will Be Your New Favorite Wrap Recipe
Get ready to bookmark this page, because these wraps are about to become a staple in your meal rotation. Here’s exactly why this recipe stands out from the rest and will win over your entire family.
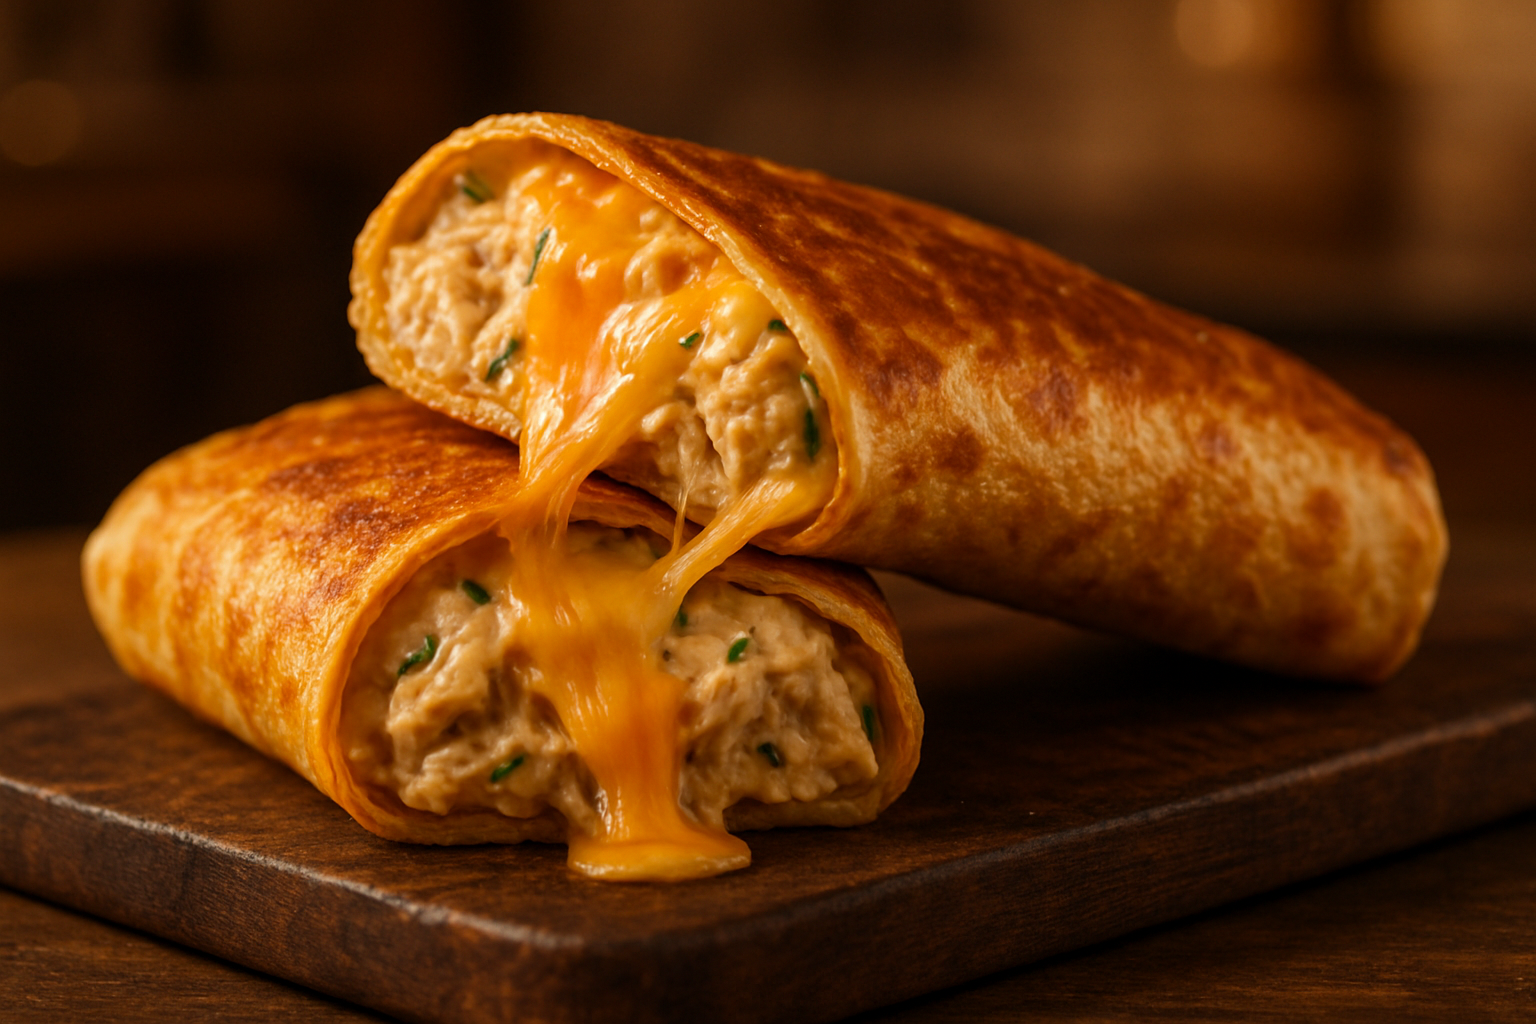
- An Unforgettable Flavor Profile: Forget bland, one-note wraps. This recipe delivers a symphony of textures and tastes. We’re talking about a rich and creamy chicken filling with a punchy garlic kick, enveloped in a glorious layer of gooey, melted cheese. It’s all encased in a golden, crispy tortilla that provides the perfect crunch in every bite.
- Unbeatable Convenience for Busy Lives: In a world where time is the ultimate currency, this meal is a lifesaver. You can have these wraps on the table in under 30 minutes, making them the perfect solution for hectic weeknights. The recipe is designed to use pantry staples and the ultimate time-saving hack: pre-cooked rotisserie chicken.
- The Ultimate in Adaptability: This recipe is a fantastic base, not a rigid set of rules. You can easily adapt it to your dietary needs by using low-carb, whole wheat, or gluten-free tortillas. The filling is a perfect canvas for your creativity—toss in some spinach, sun-dried tomatoes, or switch up the cheeses to make it your own.
- Crowd-Pleasing Power: Finding a meal that everyone loves can be a challenge, but these wraps are a certified hit. They have been tested and approved by families and are known to win over even the pickiest eaters. They’re perfect for a satisfying lunch, a quick dinner, or even for meal prepping.
- Comfort Food, Perfected: Let’s be honest, sometimes you just need pure comfort food. This recipe delivers that soul-soothing satisfaction in spades. It’s a high-protein, incredibly satisfying meal that hits all the right notes of indulgence and comfort, making you feel good from the inside out.
The Anatomy of a Perfect Wrap: Your Ingredient Checklist
The magic of these wraps lies in using the right combination of ingredients to create layers of flavor and texture. This master list is a synthesis of the best elements from dozens of variations to guarantee a flawless result.
The Creamy, Garlicky Chicken Filling
- Cooked Chicken: About 2-3 cups of shredded or chopped chicken is the heart of this wrap. For ultimate convenience and flavor, a store-bought rotisserie chicken is your best friend. Alternatively, you can cook 1 lb of boneless, skinless chicken breasts or thighs, seasoned with garlic powder, onion powder, and paprika.
- Cream Cheese: Softened cream cheese is the secret to an ultra-creamy, rich filling that doesn’t run out of the wrap. About 1/4 cup provides the perfect texture.
- Mayonnaise or Greek Yogurt: Two tablespoons of light mayonnaise or Greek yogurt add a subtle tang and extra creaminess. The yogurt is a great way to lighten it up without sacrificing flavor.
- Cheese Blend: A combination of sharp cheddar and mozzarella is the dream team. You get the bold flavor from the cheddar and that irresistible, gooey “cheese pull” from the mozzarella. You’ll need about 1.5 cups total, divided for the inside and a little extra for good measure.
- Flavor Boosters: One chopped green onion or a tablespoon of chives adds a fresh, sharp bite that cuts through the richness. A teaspoon or two of hot sauce (like Frank’s) provides a gentle warmth and zing without being overly spicy.
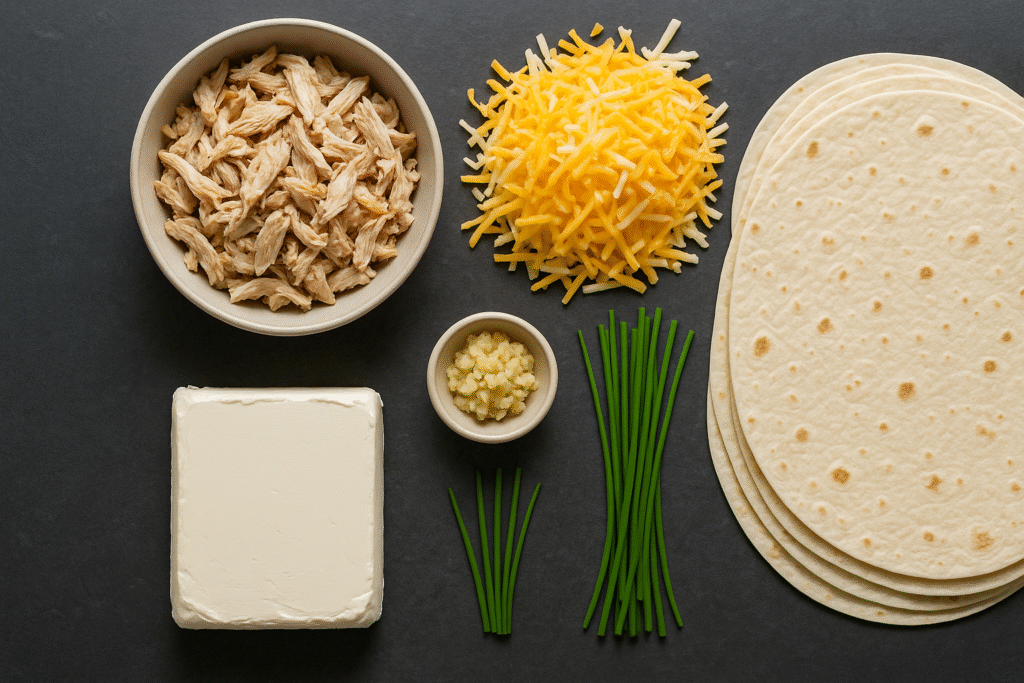
The Assembly and Finishing Touches
- Large Flour Tortillas: You’ll need 4 large (burrito-size) flour tortillas. Their pliability makes them easy to roll without tearing.
- The Magic Garlic Butter: This is the game-changing step. A simple mixture of 1 tablespoon of melted butter and 2-3 cloves of fresh, minced garlic will be brushed on the outside of the wraps before cooking. This creates an unbelievably crispy, fragrant, and golden-brown exterior that mimics a restaurant-quality finish.
| Ingredient | The “Why” | Expert Substitutions |
| Cooked Chicken | The savory, high-protein base of the wrap. | Shredded turkey, leftover pulled pork, or crispy pan-fried tofu for a vegetarian option. |
| Cheddar & Mozzarella | The perfect combination for sharp flavor and a gooey, melty texture. | Pepper Jack for a spicy kick, Provolone for a milder melt, or Gouda for a smoky flavor. |
| Cream Cheese & Mayo | The creamy, tangy binding agents that hold the filling together. | Full-fat or light sour cream, plain Greek yogurt for a healthier, tangy alternative, or dairy-free cream cheese. |
| Flour Tortillas | The classic, sturdy vessel that crisps up beautifully when pan-fried. | Whole wheat tortillas, spinach wraps for added nutrients, or certified low-carb or gluten-free tortillas. |
Crafting the Ultimate Cheesy Chicken Garlic Wrap: A Step-by-Step Guide
Follow these steps precisely, and you’ll be rewarded with the best wrap you’ve ever made. The key is in the details, from the filling to the fold to the final crisp.
Step 1: Prepare the Flavor-Packed Chicken Filling
In a large bowl, combine your 2-3 cups of shredded chicken, 1/4 cup of softened cream cheese, 2 tablespoons of mayonnaise or Greek yogurt, 1 cup of your shredded cheese blend, the chopped green onion, and 1-2 teaspoons of hot sauce. Season with a pinch of salt and pepper. Mix everything together until it’s thoroughly combined into a rich, creamy filling.
Pro-Tip: This filling is a meal-prep superstar. You can make it up to 3 days in advance and store it in an airtight container in the refrigerator. When you’re ready to eat, just assemble and cook!
Step 2: Create the Magic Garlic Butter
This simple step elevates the entire experience. In a small, microwave-safe bowl, melt 1 tablespoon of butter. Add 2-3 cloves of freshly minced garlic and stir to combine. Set it aside. This fragrant butter will be brushed onto the wraps just before they hit the pan, ensuring an incredibly flavorful and crispy crust.
Step 3: Assemble for Maximum Melt and Zero Sog
Strategic layering is crucial to prevent a soggy wrap, a common frustration for home cooks. Lay one large tortilla flat. Sprinkle a light layer of your remaining cheese (about 2 tablespoons) onto the center of the tortilla. This creates a “cheese barrier” between the filling and the wrap. Spoon about a quarter of the chicken mixture on top of the cheese. Top the filling with another sprinkle of cheese.
Step 4: Fold It Like a Pro
A tight fold is essential to keep all that deliciousness contained. Take the left and right sides of the tortilla and fold them inwards over the filling. Then, take the bottom edge (the one closest to you) and pull it up and over the filling, tucking it in snugly. Roll the wrap away from you, keeping it as tight as possible until you have a secure, sealed parcel.
Step 5: Achieve the Perfect Golden-Brown Crisp
Heat a large, non-stick skillet over medium heat. While it’s heating, lightly brush the outside of each wrap with your prepared garlic butter. Place the wraps seam-side down in the hot skillet. This helps to seal the edge immediately. Cook for 3-4 minutes per side, until the exterior is deeply golden-brown and irresistibly crispy.
Crucial Tip: After flipping the wraps, cover the pan with a lid for the last couple of minutes of cooking. This traps the heat and steam, ensuring the cheese inside becomes perfectly melted and the filling is heated through.
Alternative Cooking Methods: Your Kitchen, Your Choice
While pan-frying yields the crispiest result, these wraps are also fantastic when made in an air fryer or oven. Here’s how to adapt the recipe based on your available equipment.
| Method | Temperature & Time | Resulting Texture | Best For |
| Pan-Frying | Medium heat, 3-4 mins per side | Ultra-crispy, perfectly golden-brown exterior with a soft, gooey interior. | Achieving the ultimate crunch and most flavorful crust thanks to the garlic butter. |
| Air Frying | 375∘F (190∘C), 6-8 minutes, flipping halfway | Very crispy, with an even, all-around browning. The inside gets perfectly hot and melty. | A quick, hands-off method that delivers excellent crispiness with less monitoring. |
| Baking | 400∘F (200∘C), 10-12 minutes, flipping halfway | A softer, slightly chewy exterior that is lightly golden. It’s less crispy than frying. | Cooking a large batch of wraps all at once without needing to stand over the stove. |
Serving, Storing, and Savoring Your Creation
Now that you’ve crafted the perfect wrap, here’s how to serve it up and handle any delicious leftovers.
Serving Suggestions
These wraps are a hearty meal all on their own, but if you want to create a full spread, they pair beautifully with a variety of sides. Consider serving them alongside a tangy coleslaw, crispy sweet potato fries, or simple roasted vegetables. For dipping, you can’t go wrong with a side of creamy ranch, extra garlic aioli, or even a smoky barbecue sauce for a different flavor dimension.

Storing Instructions
Proper storage is key to enjoying these wraps later.
- Cooked Wraps: Store any leftover cooked wraps in an airtight container in the refrigerator for up to 3 days.
- Make-Ahead Filling: The chicken filling can be prepared and stored separately in the fridge for up to 3 days, ready for quick assembly.
- Freezing: While freezing the fully assembled wraps is not recommended (the tortilla can become soggy), the chicken filling itself freezes wonderfully. Store it in a freezer-safe bag or container for up to 1 month. Thaw it in the refrigerator overnight before using.
The Reheating Dilemma: Solved!
We’ve all experienced the disappointment of a leftover wrap that has gone soft and sad in the fridge. The microwave is the enemy of a crispy tortilla! To bring your
Cheesy Chicken Garlic Wraps back to their original glory, follow these simple steps:
- Skillet Method (Recommended): Place the cold wrap in a dry, non-stick skillet over medium-low heat. Cook for 2-3 minutes per side, or until the tortilla is crisp again and the filling is warmed through.
- Air Fryer Method: Reheat the wrap in an air fryer at 350∘F (175∘C) for about 5 minutes, or until crispy and hot.
Cheesy Chicken Garlic Wraps
Ingredients
Method
- Prepare Filling: In a large bowl, combine chicken, cream cheese, mayo/yogurt, 1 cup of cheese, green onion, and hot sauce. Mix well and season with salt and pepper.
- Make Garlic Butter: In a small bowl, mix melted butter and minced garlic.
- Assemble: Lay a tortilla flat. Sprinkle ~2 tbsp cheese in the center. Top with 1/4 of the chicken filling, then another sprinkle of cheese.
- Fold: Fold the left and right sides in. Tightly roll the wrap from the bottom up to create a sealed parcel.
- Cook: Lightly brush the outside of each wrap with garlic butter. Heat a large non-stick skillet over medium heat. Place wraps seam-side down. Cook for 3-4 minutes per side until golden-brown and crispy. Cover the pan for the last few minutes to melt the cheese perfectly.
Notes
- The chicken filling can be made up to 3 days in advance and stored in an airtight container in the refrigerator.
- To reheat and maintain crispiness, use a skillet or an air fryer at 350°F (175°C) for 5 minutes. Avoid the microwave.
- Feel free to use low-carb or gluten-free tortillas to fit your dietary needs.
Your Questions, Answered: The Ultimate Wrap FAQ
Here are answers to some of the most common questions to ensure your wrap-making journey is a total success.
Can I make these gluten-free?
Absolutely! The filling is naturally gluten-free. Simply substitute the flour tortillas with your favorite brand of large, certified gluten-free wraps. The cooking process remains the same.
How do I stop my wraps from falling apart?
There are two secrets to a well-behaved wrap. First, don’t overfill it. It’s tempting to pack it full, but this makes rolling difficult. Second, ensure you fold it tightly, tucking in the sides first before rolling from the bottom. Finally, placing the wrap seam-side down in the hot pan first helps to create a seal that holds everything together.
Can I use a different kind of chicken?
Yes! This recipe is incredibly flexible. Leftover grilled or baked chicken is perfect. Even shredded turkey or pork would be delicious. The key is to have about 2-3 cups of cooked, shredded protein to mix with the creamy filling.
Can I freeze these wraps?
It’s best not to freeze the fully assembled and cooked wraps, as the tortilla’s texture can become compromised upon thawing. However, the prepared chicken filling can be frozen with excellent results for up to 1 month. It’s a fantastic way to prep for future meals.
What’s the best way to make these wraps healthier?
For a lighter version, you can make a few simple swaps. Use low-carb or whole wheat tortillas, opt for light cream cheese and plain Greek yogurt instead of full-fat versions, and pack in extra vegetables like fresh spinach, chopped bell peppers, or sautéed mushrooms for added nutrients and fiber.
Join the Wrap Revolution: Your Turn to Cook
You are now armed with everything you need to create the most delicious, crispy, and satisfying Cheesy Chicken Garlic Wraps imaginable. This recipe offers a quick, affordable, and endlessly customizable meal that will make you forget all about takeout. It’s more than just a dinner; it’s a solution for busy nights and a guaranteed crowd-pleaser.
We’d love to hear from you! If you make these Cheesy Chicken Garlic Wraps, please come back and leave a rating and review below to let us know how they turned out. Have a question or a brilliant variation idea? Drop a comment in our blog! And for more perfected recipes designed for real life, don’t forget to subscribe to our newsletter.
Looking for more quick dinner ideas? Check out our Cheesy Penne with Garlic Butter Ground Beef or our fan-favorite Garlic Butter Chicken Bites.